

DTF Powder Shaker Troubleshooting Guide for Common Issues and Fixes
Understanding Your DTF Powder Shaker: Basics and Setup Essentials
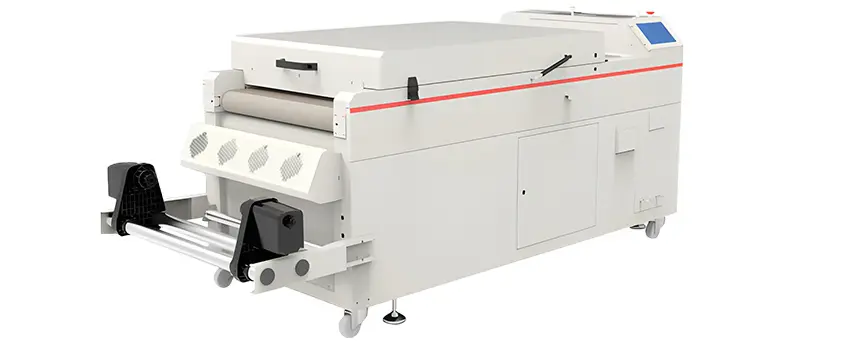
If you\’re working with DTF (Direct to Film) printing, your powder shaker is an essential piece of the puzzle. Simply put, the DTF powder shaker evenly distributes adhesive powder onto printed films, ensuring strong, lasting transfers when heat-pressed onto fabrics.
Role in the DTF Process
After printing your design onto the PET film, the powder shaker\’s job is to apply just the right amount of hot melt adhesive powder. This powder melts during curing to bond ink and fabric securely. A poorly calibrated or malfunctioning shaker means uneven powder application DTF users dread—leading to patchy prints and adhesion issues.
Key Components
A typical DTF powder shaker includes:
- Powder hopper: Holds the adhesive powder
- Vibrating or shaking mechanism: Controls powder flow
- Conveyor belt or platform: Moves printed film underneath
- Heating or curing zone (in some models): Starts powder melting
- Control panel: Adjusts speed, vibration intensity, and temperature
Brands like jinlong DTF are known for combining reliability with precision controls to streamline this process.
Optimal Setup Tips
Set your shaker up right to avoid headaches later:
- Use consistent ambient humidity to reduce static buildup.
- Calibrate vibration intensity for even powder distribution based on your powder type.
- Align conveyor belts properly to prevent shifting films.
- Maintain the hopper’s powder level to avoid interruptions.
Quick Diagnostic Checklist
Before you start, check these to catch common setup issues fast:
- Is the powder hopper clean and filled?
- Are the shaker vibrations steady and appropriate?
- Is the film aligned perfectly on the conveyor?
- Is the heating element (if equipped) working at correct temps?
- Are static discharges minimized with grounded equipment?
Understanding these basics will help you troubleshoot efficiently and keep production smooth—saving time and costly reprints down the line.
Common Issue #1: Uneven Powder Distribution
Symptoms
You’ll notice that the powder isn’t spreading evenly across the film. Some areas look bare, while others are overloaded with powder. This leads to inconsistent prints and poor adhesion after curing.
Root Causes
- Improper shaker speed or vibrations
- Incorrect powder flow rate or shaker gap settings
- Uneven surface on the film or feeder tray
- Worn-out shaker belts or misalignment
- Using damp or clumped powder affecting flow
Step-by-Step Fixes
- Adjust the shaker speed to ensure a consistent shake—too fast or slow can cause uneven spread.
- Check and calibrate the gap between the shaker and film; it should be even across the width.
- Inspect shaker belts for wear or misalignment and replace or realign if needed.
- Level the film surface and feeder tray so the powder flows evenly.
- Use fresh, dry powder and store it properly to prevent moisture clumps.
- Run a few test sheets after adjustments to confirm even distribution.
Prevention
- Regularly clean and inspect shaker components.
- Follow a powder shaker calibration guide to keep settings consistent.
- Store DTF powder in a dry, sealed container to avoid moisture buildup.
Pro Tip
For best results, keep your powder shaker and curing system well-matched. Uneven powder application DTF issues often come from mismatched equipment settings, so don’t forget to check your entire DTF setup regularly.
For more on related equipment and setup, see our insights on how TPU powder DTF is revolutionizing the printing industry to compliment your powder shaker maintenance routine.
Common Issue #2: Powder Clumping or Blockages

Symptoms
- Powder doesn’t flow smoothly from the shaker
- Visible clumps or lumps on the coating surface
- Blockages inside the powder shaker feeder or outlet
- Irregular or spotty powder coverage on prints
Root Causes
- High humidity or moisture exposure causing powder to stick together
- Using old or expired powder that has absorbed moisture
- Inadequate powder storage – improper sealing or environmental control
- Powder shaker components clogged due to residue buildup or static electricity
- Shaker settings too low or machine vibrations causing uneven powder feed
Step-by-Step Fixes
- Check humidity levels: Ensure your workspace is dry and use a dehumidifier if needed.
- Inspect and clean shaker parts: Remove residue buildup in the powder feeder, outlet, and filters using compressed air or a soft brush.
- Replace old powder: Use fresh, well-stored powder. Avoid powder past its shelf life or that has been exposed to moisture.
- Adjust shaker settings: Increase shaker intensity and speed if clumping continues to disrupt flow. Calibrate according to your powder type.
- Improve powder storage: Store powder in airtight containers away from moisture and heat. Consider using desiccant packs to absorb humidity.
- Anti-static measures: Ground your equipment and workspace to reduce static buildup that attracts powder clumps.
Prevention
- Always keep powder sealed when not in use.
- Maintain consistent shop temperature and humidity control.
- Clean the shaker regularly to avoid powder buildup.
- Rotate stock based on usage to prevent expired powder use.
- Perform routine shaker calibration for smooth operation.
Case Study
A small print shop in Texas struggled with blocked powder feeders every week during summer months. After installing a dehumidifier and switching to airtight powder containers, the issue disappeared. They also implemented a weekly shaker cleaning schedule and saw consistent, even powder application. This simple routine saved them time and powder waste while improving print quality noticeably.
For more strategies on maintaining DTF equipment and troubleshooting, check out our full guide on impresoras y materiales DTF de alta calidad.
Common Issue #3: Excessive Static Buildup and Powder Sticking
Symptoms
- Powder sticks unevenly or clumps on the transfer film.
- You notice powder is attracted to surfaces it shouldn’t be, causing messy results.
- Static sparks or crackling sounds near the shaker during operation.
Root Causes
- Low humidity in the workspace increasing static electricity.
- Lack of proper grounding on the DTF powder shaker or nearby equipment.
- Using powder that’s too dry or stored improperly.
- Plastic or synthetic materials in the shaker setup generating static.
Step-by-Step Fixes
- Increase Humidity: Use a humidifier to keep relative humidity around 40-60% to reduce static buildup.
- Ground Your Equipment: Make sure the powder shaker and surrounding components are properly grounded to dissipate static charge.
- Anti-Static Spray: Apply anti-static sprays on your workstation surfaces and shaker housing to minimize powder sticking.
- Powder Conditioning: Slightly moisten or use powder with anti-static properties recommended by your supplier.
- Remove Static-Prone Materials: Replace plastic covers or conveyor belts with grounded or static-dissipative materials.
- Routine Cleaning: Regularly wipe down the shaker and nearby surfaces to avoid dust and powder buildup increasing static cling.
Prevention
- Keep your workspace humidified, especially in dry winter months.
- Store DTF powder in airtight containers with desiccants to avoid excessive dryness.
- Regularly test and confirm grounding of all electrical equipment connected to the shaker.
- Use anti-static mats or wrist straps for operators to minimize static generation.
Visual Aid
Imagine a lightly fogged environment, where static charges vanish, and powder flows evenly without sticking. That’s the goal—it makes your powder shaker run smoother and your DTF transfers come out flawless every time.
For more specific tips on powder handling and equipment setup, check out detailed guides like this DTF transfer film double basic series to enhance your overall DTF printing quality.
Common Issue #4: Shaker Not Powering On or Starting
Symptoms
- The DTF powder shaker shows no signs of power—no lights, sounds, or movement.
- The machine does not respond when you press the start button.
- Occasional power flickers or the shaker shuts off unexpectedly.
Root Causes
- Power supply problems (e.g., unplugged cords, blown fuses).
- Faulty electrical connections inside the shaker.
- Internal component failures like motor burnout or switch issues.
- Overheating protection triggered, causing automatic shutdown.
- Issues with the control panel or circuit board.
Step-by-Step Fixes
- Check the power source: Ensure the shaker is plugged into a working outlet. Test the outlet with another device if uncertain.
- Inspect the power cord: Look for visible damage or loose connections. Replace if necessary.
- Reset the circuit breakers or replace fuses: If the breaker tripped, reset it; if a fuse blew, swap it with a matching one.
- Examine the internal wiring: Only if you’re trained, open the shaker’s cover and check for loose wires or burnt components.
- Test the motor and switches: Use a multimeter to confirm they\’re functioning properly.
- Cool down the shaker: If the machine overheated, let it rest before restarting.
If these steps don’t solve the issue, it might be time to contact professional DTF equipment support.
Prevention
- Always verify power connections before starting work.
- Avoid overloading circuits with too many devices.
- Schedule regular electrical inspections for your equipment.
- Keep the shaker clean and well-ventilated to prevent overheating.
Safety Note
- Unplug the machine before inspecting or performing any repairs.
- Do not attempt complex electrical repairs unless qualified.
- Use insulated tools and proper protective equipment when handling electrical parts.
For more tips on optimizing your DTF setup, check out our detailed DTF Transfer Film Double Pro Series for high-quality materials that work seamlessly with your powder shaker.
Common Issue #5: Inadequate Heating or Curing During Shaking

Symptoms
- Powder doesn’t melt or cure properly
- Prints feel rough or powdery after shaking
- Colors appear dull or uneven
- Transfers peel off easily after pressing
Root Causes
- Heating element malfunction or failure
- Incorrect temperature settings
- Uneven heat distribution inside the shaker
- Power supply interruptions
- Clogged heating vents or dirty components
Step-by-Step Fixes
- Check Temperature Settings: Verify the shaker temperature matches the powder manufacturer’s recommended curing temp. Adjust as necessary.
- Inspect Heating Elements: Look for visible damage or burn marks on heating coils and replace if faulty.
- Clean Vents and Fans: Remove dust or debris that may block airflow and cause uneven heating.
- Test Power Supply: Ensure consistent power flow without fluctuations or interruptions.
- Calibrate Heat Distribution: Use a thermometer probe to measure heat uniformity inside the shaker chamber and adjust settings or reposition items accordingly.
- Reset or Restart Equipment: Power cycle the shaker to clear possible electronic glitches.
Consejos de prevención
- Regularly clean and maintain heating components
- Use a reliable power source or surge protection
- Follow the recommended curing temperature and timing for your specific DTF powder
- Perform routine shaker calibration checks
Troubleshooting Table
| Problema | Posible causa | Solución rápida | When to Call a Pro |
|---|---|---|---|
| Powder not curing | Heating element issues | Inspect and replace elements | If replacements don’t help |
| Uneven heating | Airflow blockage | Clean vents and fans | Persistent hot/cold spots |
| Shaker won’t heat | Power supply problems | Check connections and fuse | Electrical system inspection |
| Color fading | Incorrect temp | Adjust temp controls | If temp sensor faulty |
Addressing inadequate heating or curing problems promptly can save you from print quality loss and costly downtime. For a smooth experience, always pair your powder shaker with recommended powders like those found in DTF ink CMYK options to ensure proper compatibility and curing performance.
Common Issue #6: Powder Overflow or Waste
Symptoms
- Excess powder spills outside the garment or target area
- Visible powder piles around the shaker
- Frequent need to clean up excess powder after each run
- Lowered efficiency due to wasted material
Root Causes
- Incorrect powder shaker settings (speed or amount)
- Overfilling the powder hopper
- Misaligned shaker nozzles or belt
- Using powder that’s too fine or improperly stored
- Excessive static causing powder to stick where it’s not needed
Step-by-Step Fixes
- Adjust the powder feed settings: Lower the shaker speed or powder output to match the garment size and design detail.
- Check hopper fill levels: Don’t overfill the powder hopper, keep it at recommended capacity to avoid overflow.
- Realign nozzles and belts: Ensure the shaker components are correctly aligned to evenly spread powder without spilling.
- Use the right powder grade: Choose powder designed for your specific DTF printer and shake process. Store the powder in a dry, anti-static environment.
- Control static buildup: Ground the shaker properly and use anti-static sprays if necessary to reduce powder cling and overflow.
Prevention
- Regularly calibrate your powder shaker following the DTF powder shaker calibration guide.
- Maintain proper hopper levels and clean the shaker after each job.
- Avoid using expired or moisture-affected powder.
- Keep your work environment humidity between 40-60% to reduce static and powder spreading issues.
Efficiency Hack
Set up a powder catch tray beneath the shaker to collect any sprinkles of excess powder. This allows you to reuse the powder rather than waste it, directly saving on material costs and cleanup time.
For a deeper dive on how powered DTF machines improve over manual powdering and help control waste better, check out this guide on DTF printer shaker and oven vs manual powdering.
Common Issue #7: Poor Adhesion After Shaking
Symptoms
- The powder doesn’t stick well to the transfer film.
- Transfers peel off easily after pressing or washing.
- Colors look faded or patchy on the final print.
Root Causes
- Insufficient or uneven powder application during shaking.
- Incorrect powder melting temperature or curing time.
- Contaminated transfer surface or film.
- Using incompatible powder or transfer film types.
- Overheating or underheating during the curing process.
Step-by-Step Fixes
- Check Powder Distribution: Ensure the powder shaker is calibrated correctly for an even spread. Uneven powder application leads to weak adhesion.
- Adjust Heating Settings: Verify that your curing oven or heat press is set to the right temperature recommended for your powder and film.
- Clean Transfer Surfaces: Always use clean, dust-free films like the ones available in the DTF transfer film double basic series to avoid contamination.
- Match Materials: Confirm that powder and film are compatible, as mismatched products affect glue performance.
- Test and Retest: Run small test transfers to dial in the perfect powder amount and curing conditions before full production.
Prevention
- Regularly calibrate your powder shaker to ensure consistent powder application.
- Store powders and films properly to avoid moisture buildup and contamination.
- Follow manufacturer guidelines strictly for temperature and curing times.
- Rotate stock frequently to use fresher powders with better adhesive properties.
Testing Protocol
- Apply powder on a small test strip and heat press under controlled settings.
- Check for strong adhesion and vibrant color after washing the test sample.
- Adjust powder amount or heat settings based on results. Repeat tests until you reach optimal adhesion.
Poor adhesion can halt your production, but with steady monitoring and proper calibration, you’ll keep your transfers sticking strong every time. For more tips on compatible films and powders, explore the professional DTF transfer films.
Common Issue #8: Mechanical Wear and Noises (Grinding or Squeaking)
Symptoms
- Loud grinding or squeaking noises during operation
- Irregular movement or shaking
- Shaker belt slipping or misalignment
- Decreased powder distribution quality
Root Causes
- Worn-out bearings or gears
- Lack of lubrication on moving parts
- Misaligned or damaged shaker belt
- Accumulated debris inside the shaker mechanism
- Overuse without regular maintenance
Step-by-Step Fixes
- Turn off and unplug the shaker to ensure safety.
- Inspect belts and gears for visible wear or damage; replace if necessary.
- Clean inside the shaker to remove any accumulated powder or debris.
- Lubricate bearings and moving mechanisms using manufacturer-recommended lubricants.
- Realign or tighten any loose belts to prevent slipping.
- Run the shaker at low speed initially to test for unusual noises.
- If noise persists, disassemble key components for a detailed inspection or consult a professional.
Prevention
- Schedule weekly visual checks for wear and belt tension.
- Lubricate moving parts monthly to keep everything running smoothly.
- Keep your work area clean to prevent debris buildup inside the shaker.
- Use genuine parts for replacements to ensure compatibility and durability.
When to Call a Pro
- Persistent grinding or squeaking after basic fixes
- Signs of internal damage or worn gearbox
- Complex belt alignment issues beyond user manuals
- Unexpected electrical noises or motor overheating
Mechanical wear can quickly escalate if ignored, so staying proactive with maintenance is key. For extended guidance on shaker setup and longevity, consider checking detailed maintenance tips in our DTF shaker calibration guide.
Advanced Troubleshooting: When Basic Fixes Fall Short
Sometimes, the usual quick fixes for your DTF powder shaker aren’t enough. When issues persist, it’s time for advanced troubleshooting using diagnostic tools and detailed logging.
Diagnostic Tools
- Utilice un multimeter to check electrical connections and power flow inside the shaker.
- Employ an infrared thermometer to verify consistent heating during powder curing.
- Utilize software diagnostics if your shaker has digital controls, helping identify sensor errors or motor faults.
Integration Issues
DTF powder shakers often need to work smoothly with your DTF printer and curing oven. Misalignment in timing or temperature between devices can cause problems like uneven powder application or poor adhesion. Check that your shaker’s settings sync with your heating unit and printer speeds to avoid workflow disruptions.
Log-Keeping Template
Keeping a simple log can save you time and headaches. Track:
- Date and time of issues
- Description of symptoms
- Fixes attempted
- Results
This data helps spot patterns and improve troubleshooting efficiency over time.
Brand Spotlight
Certain brands offer better support and smarter diagnostics. When buying or upgrading, consider models known for easy integration and detailed error reporting, such as those compatible with your DTF transfer film setup. Investing in a reliable brand can significantly reduce downtime and improve overall print quality.
Advanced troubleshooting might take a bit more effort, but with the right tools and records, you’ll keep your DTF powder shaker running smoothly long-term.
Preventive Maintenance Schedule for Long-Term Reliability
Keeping your DTF powder shaker in top shape means following a simple maintenance routine. Regular care prevents common issues like uneven powder application, static buildup, or equipment wear. Here’s a straightforward schedule to maximize reliability and extend the life of your shaker.
| Frequency | Maintenance Task | Por qué es importante |
|---|---|---|
| Diario | – Clean powder residue from shaker & hopper – Check power cords and connections – Verify powder flow is consistent | Prevents clumps, static, and electrical faults before starting work |
| Semanal | – Inspect and tighten belts and screws – Calibrate powder shaker level and settings – Wipe down sensor and heating elements | Reduces mechanical wear and keeps powder distribution even |
| Mensualmente | – Deep clean internal shaker components – Lubricate moving parts if applicable – Test electric components for signs of damage or corrosion | Helps avoid major breakdowns and ensures consistent curing and adhesion |
Benefits of a Preventive Maintenance Routine
- Fewer breakdowns: Early detection helps address issues before they escalate.
- Consistent quality: Maintains even powder distribution and proper curing.
- Increased equipment lifespan: Less wear and tear on mechanical parts.
- Cost savings: Avoid expensive repairs and downtime.
Bonus Resource
For detailed guidance on powder and equipment care, consider resources like the DTF TPU powder solutions page, which offers tips on powder storage and handling to prevent clumping and static issues.
Stick to this schedule, and your DTF powder shaker will keep performing reliably day after day.


