

How to DTF at Home Small Workshop Guide with Essential Equipment
The Essential Setup: What You Need for DTF at Home or Small Workshop
Starting Direct to Film (DTF) printing requires specific equipment and materials tailored to this process. Here’s a concise guide to what you need and why each component is crucial.
Printer: Converted Photo Printers vs. Dedicated Entry-Level DTF Printers
| Feature | Converted Photo Printer (e.g., Epson L1800) | Dedicated Entry-Level DTF Printer |
|---|---|---|
| White Ink Circulation | Often lacks or requires aftermarket mods | Built-in white ink circulation system |
| Reliability |
Step-by-Step: The Printing Process
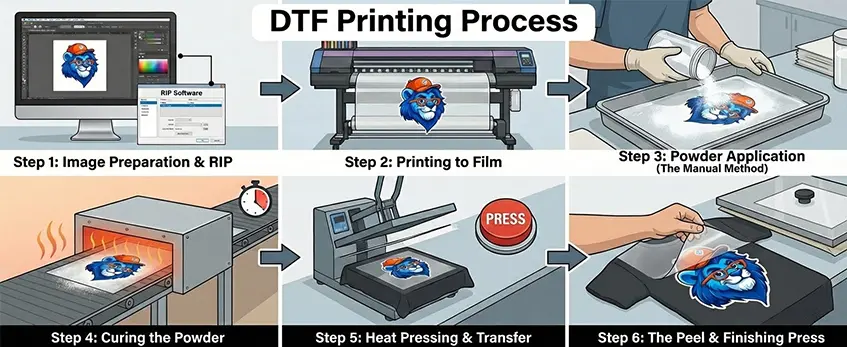
Step 1: Image Preparation & RIP
Start with your artwork in a high-quality PNG format with a transparent background to ensure clean edges. Set up the white ink layer carefully in your RIP software—this layer acts as the base and needs choke settings applied to prevent unwanted white borders or halos around your print. Don\’t forget to mirror your image since it will be flipped during transfer.
Step 2: Printing to Film
Load your PET film with the matte side facing up, as this is the printable surface. Keep an eye on print speed and adjust the white ink density for vibrant, sharp results without over-saturating. Dedicated RIP software for DTF (like AcroRIP or CADlink) is essential here because standard printer drivers won’t handle white ink layers or ink circulation correctly.
Step 3: Powder Application (The Manual Method)
Pour your hot melt powder into a small tray or bin to control mess and make powder application easy. Apply powder evenly across the wet print, then use the \”flick\” technique—gently shake off excess powder to avoid speckling on the garment during transfer.
Step 4: Curing the Powder
Bake the printed film and powder in your oven or heat press until the powder changes from gritty granules to a shiny, \”orange peel\” texture. Aim for about 160°C (320°F) for 2-3 minutes. Proper curing makes the powder tacky enough for transferring but not overcooked to avoid brittleness.
Step 5: Heat Pressing & Transfer
Before pressing, pre-press your garment to remove moisture and wrinkles, ensuring better adhesion. Position the cured film on the garment accurately, then press using even pressure at the recommended temperature and time. Consult your DTF ink and powder specs for exact heat press settings.
Step 6: The Peel & Finishing Press
If you’re using PET film cold peel type, allow the print to cool before peeling to prevent smudging. After peeling, do a second press with a Teflon sheet on top for added durability and wash resistance. This finishing step seals the print tightly into the fabric.
Following these steps closely helps produce consistent, professional-quality direct to film printing results right at your home or small workshop. For reliable PET film supplies designed specifically for DTF, check out the Jinlong DTF transfer film options.
Maintenance: The Reality of DTF
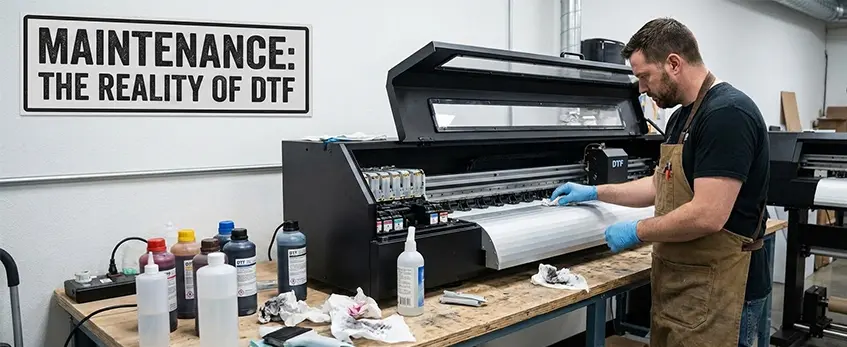
Maintaining your DTF system is crucial for consistent print quality, especially when working from home or a small workshop. Regular upkeep keeps your printer running smoothly and helps avoid costly downtime.
Daily Routines
- Nozzle Checks: Start each day with a DTF nozzle check to catch any clogged or weak nozzles early. This prevents print streaks and color gaps common in direct to film printing.
- Shake White Ink Tanks: White ink tends to settle and separate. Give the white ink tanks a gentle shake to keep the pigment evenly mixed, ensuring smooth feed through the white ink circulation system.
Weekly/Monthly Care
- Clean Capping Station & Wiper Blade: Dirt and ink buildup on the capping station or wiper blade can cause printhead damage. Clean these parts carefully once a week or monthly, depending on print volume, to extend the life of your printhead.
Vacation Mode: When Not Printing for a Week
- Wet Capping: If you plan to pause printing for a week or longer, use wet capping to keep the printheads moist. This prevents white ink from drying inside the nozzles, reducing the risk of permanent clogs.
For detailed advice on monitoring ink status, knowing when your DTF printer is truly out of ink versus clogged is also important to avoid unnecessary maintenance: check out this guide on how to tell if your DTF printer is out of ink or clogged.
Regular maintenance is your best defense against common home DTF issues and keeps your prints fresh and sharp.
Troubleshooting Common Home-DTF Issues
When working with a DTF transfer printer at home or in a small workshop, a few common hiccups can pop up. Here’s how to tackle some of the most frequent problems to keep your prints sharp and durable.
Ink Starvation: Why Streaks Appear and How to Fix Them
If you see streaks or missing ink lines on your prints, it’s usually ink starvation. This happens when your printhead isn’t getting enough ink—most often the white ink since it can settle or clog without proper circulation. To fix this:
- Shake and agitate your white ink tanks regularly—this prevents pigment from settling.
- Perform routine DTF nozzle checks to identify blocked nozzles.
- Run cleaning cycles or manual head flushes if you notice streaking.
- Make sure your printer’s white ink circulation system is working efficiently, as this is crucial to avoid clogs.
Film Buckling: Dealing with Head Strikes
Film buckling occurs when the PET film isn’t flat under the printhead, leading to head strikes and ruining prints. To avoid this:
- Use high-quality PET film like the Jinlong DTF transfer films that lay flat and resist curling.
- Ensure the film is loaded matte side up and pulled taut but not tight enough to stretch.
- Adjust your printer settings for slower print speed if buckling persists.
- Regularly clean the printhead area and check that the platen is smooth and free of debris.
Adhesion Issues: Why the Print Might Peel Off After Washing
If your DTF prints peel or crack post-wash, it usually boils down to undercuring or overcuring the hot melt powder. Here’s what to watch:
- Undercuring leaves the powder insufficiently melted, compromising adhesion. Follow standard curing times around 160°C for 2-3 minutes with a heat press or curing oven.
- Overcuring can make the print brittle and prone to cracking. Stick to manufacturer guidelines for heat press temperature settings and pressure.
- Choose the right powder color (white or black) to match your garment color, as improper powder can affect bonding too.
- Pre-press your garment to remove moisture before transfer, avoiding adhesion failure due to damp fabric.
With attention to these common issues and proper maintenance, your home or small workshop DTF printing will stay consistent and professional.


