

Optimize DTF White Ink Settings for Consistent High-Quality Prints
Understanding DTF White Ink and Its Role in Consistent Printing
White ink is the backbone of vibrant DTF prints, especially on dark garments. Unlike color inks, white ink uses dense pigments with specific viscosity to create an opaque base layer that makes colors pop. Getting the pigment mix and flow just right is critical to avoid issues like milky or translucent prints.
Why White Ink Needs Special Care on Dark Garments
Because white ink acts as an underbase, it requires extra opacity to block dark fabric from dulling colors. If the ink is too thin or improperly applied, the final print loses vibrancy and crispness. This means careful control of opacity and layering is essential.
Key Factors Affecting Consistency
| Factor | Impact on White Ink Print Quality |
|---|---|
| Ink Formula & Viscosity | Determines opacity and flow; Jinlong inks excel here |
| Environment | Temperature & humidity affect drying and viscosity |
| Hardware | Nozzle condition & printer calibration influence ink deposition |
| Software RIP | White channel setup and print profiles control density and layering |
Benefits of Optimized White Ink Settings
When settings are dialed in, you get:
- Brighter whites that boost color vibrancy
- Bordes más afilados that reduce fringing and improve detail
- Less ink usage cutting costs without sacrificing quality
In short, mastering DTF white underbase settings leads to consistent, high-impact prints on dark garments every time. Start with stable ink viscosity and proper RIP configuration to unlock these advantages.
Essential Prerequisites Before Adjusting White Ink Settings
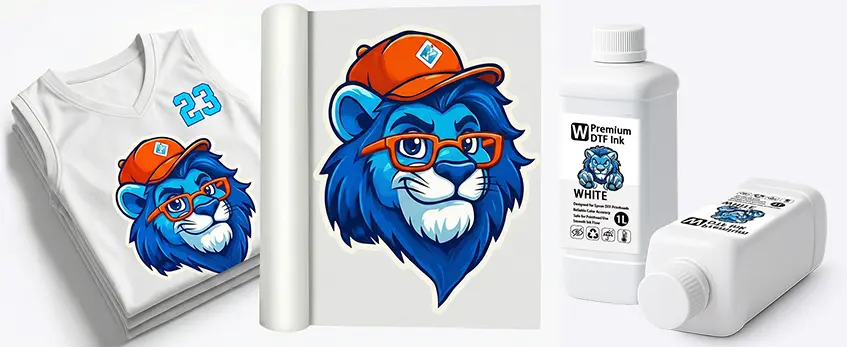
Before diving into DTF white ink settings optimization, start with the right foundation. First, choose a compatible, high-quality DTF white ink—Jinlong formulas stand out for consistent opacity and smooth flow. Using premium ink like Jinlong helps widen your optimal working range and prevents common issues such as clogging or inconsistent coverage.
Next, establish solid ink preparation routines. Always shake the white ink bottles well before use to homogenize the pigment, and run the circulation system if your printer has one. Check the ink viscosity regularly—ideally between 15-20 cP—to ensure proper flow and print density. Keeping viscosity in range avoids problems like milky whites or uneven opacity.
Setting up your printer and environment is just as important. Maintain a stable temperature around 70-75°F and humidity near 40-60%, avoiding fluctuations that affect ink drying and adhesion. Use high-quality DTF transfer films, such as those recommended by Jinlong, for better ink laydown and peel results. Don’t forget to check your printer nozzles frequently to prevent clogging and maintain print precision.
Lastly, get your RIP software basics squared away. Make sure to enable the white ink channel and set the correct separation order for underbase and color layers. Load your initial print profiles carefully—it’s crucial for establishing a reliable starting point before tweaking settings. For efficient workflow, understanding these RIP parameters can save time and boost consistency in your prints.
For more on using quality transfer films, check out Jinlong’s guide on their Productos de película de transferencia DTF to complement your white ink setup.
Core DTF White Ink Settings Optimization

Optimizing your DTF white ink settings is key for consistent prints with great opacity and sharp details. Start by setting your printer resolution between 600 a 720 PPP for the white underbase to ensure enough ink density without over-saturating. Use multi-pass printing—typically 2 to 4 passes—to build up a dense, even white layer that boosts coverage, especially on dark garments.
Para ink density and opacity, target a strong white underbase that fully blocks the garment color. Aim for maximum white channel values in your RIP software while balancing ink limits to prevent flooding or ink pooling. For highlights, reduce opacity slightly to maintain softness without losing vibrancy.
Adjust the white choke and underbase pixels carefully to avoid fringing around your designs. Choking the white layer inward by 1–2 pixels eliminates unwanted white halos and sharpens edges, enhancing overall print clarity.
Controlar print speed and heater settings to improve ink adhesion and drying. Slower print speeds allow more precise ink laydown, while heater temperatures (around 70–80°C) help the ink cure properly without scorching the film. Set ink usage limits in your RIP to balance between good coverage and ink economy.
Advanced RIP settings like max white, brightness (L-value), feathering, and object fill let you fine-tune the white layer’s look. Increase max white to boost opacity; adjust feathering to soften transitions; and manage object fill settings to avoid gaps or uneven ink application.
Following these core optimizations ensures a reliable, crisp, and bright DTF white underbase that performs consistently, reducing waste and saving time during production.
For practical guidance tailored to the ink and films you use, check out resources on compatible DTF film options that enhance print quality, like the one from Jinlong’s basic double DTF transfer film series.
Step-by-Step Calibration Process for Consistent Output

Getting consistent DTF white ink results starts with a solid calibration routine. Here’s a straightforward process to follow:
- Print test patterns that check nozzle health, ink density, opacity, and white choke. These patterns reveal if your white underbase is properly set and free from gaps or fringing.
- Baseline print measurements: Use tools or visual checks to assess opacity levels and edge sharpness on these test prints.
- Tweak settings: Adjust ink density, choke pixels, and print passes based on your test outcomes to hit your target opacity and crispness.
- Reprint and compare: Repeat tests to confirm improvements and stable output.
For users of common RIP software like CADlink o Digital Factory, configuring white channel settings is key—enable proper separation order and use their measurement tools for fine-tuning. These programs often offer advanced controls such as max white adjustment and feathering to smooth edges and maximize opacity.
Leveraging the wider optimal ranges of tinta jinlong DTF simplifies calibration. Their ink formulas offer stable viscosity and pigment concentration, allowing for some flexibility in printer settings without losing output quality. This makes your calibration workflow both efficient and reliable, ensuring consistent bright whites and precise underbase coverage across dark garment prints.
For more insights on optimizing your DTF printer environment and ink compatibility, check out the detailed info on the DTF printer for clothes on dark fabrics.
Troubleshooting Common White Ink Issues and Maintaining Consistency
Keeping your DTF white ink printing consistent means knowing how to tackle common problems fast and smart. Here’s what typically causes issues—and how to fix them for reliable, high-opacity prints every time.
Causes and Fixes for Clogging and Sedimentation
White ink in DTF printers tends to settle or clog because pigment particles are heavier. To prevent this:
- Regularly shake and circulate the ink before printing to avoid sedimentation.
- Use a high-quality DTF white ink formula like Jinlong’s, designed for better stability and flow.
- Run nozzle checks often and clean nozzles as soon as you spot clogs to keep print heads clear.
- Maintain optimal viscosity around 15-20 cP to reduce clogging risk.
Solving Inconsistent Opacity or Gray/Milky Whites
If your white underbase looks dull or milky instead of crisp and bright:
- Check ink density and underbase thickness in your RIP software; increase print passes or adjust DPI if needed.
- Confirm that your white channel settings are correctly enabled and profiles loaded to boost opacity.
- Make sure your film quality and heater settings allow for complete drying—not too fast or too slow.
Adjustments for Ink Running, Pooling, Poor Adhesion
Ink running or pooling can blur details and cause adhesion issues:
- Lower print speed or reduce ink limits on white layers to prevent excess ink.
- Adjust heater temperature and dwell time to improve drying and sticking without overheating.
- Use quality TPU powder with your prints to enhance tackiness and durability.
Correcting Color Shifts, Fringing, and Alignment Problems
Color shifts or white ink fringing around edges often point to misalignment or RIP settings:
- Fine-tune white choke values and underbase pixel overlap to avoid halos.
- Align print heads precisely and perform channel registration calibration regularly.
- Double-check your white opacity and brightness settings to balance sharpness without causing color bleeding.
Long-Term Strategies: Maintenance Schedules, Idle Protocols, Batch Testing
Prevent issues before they start by sticking to routine care:
- Follow a printer maintenance schedule that includes head cleaning, ink circulation, and equipment checks—as recommended in the professional DTF printer maintenance routines used by top print shops.
- Use idle protocols to prevent ink settling when printers are not in use for extended periods.
- Test batches regularly for color, opacity, and adhesion consistency to catch problems early.
By understanding and applying these fixes and preventive measures, you can keep your DTF white ink output sharp, bright, and consistent—even on tricky dark garments.
Best Practices for Production Efficiency and Scalability
To keep your DTF white ink output consistent and efficient at scale, streamlining your production workflow is essential. Here are some key best practices:
Automate RIP Presets by Job Type
Set up custom RIP software presets tailored for different garment colors and designs. Automating white ink underbase settings and print resolution saves setup time and maintains consistency across batches.
Optimize Ink Usage to Reduce Waste
Fine-tune white ink density calibration and choke adjustments to avoid overuse. Using just the right amount of white underbase not only cuts costs but also prevents clogging and sedimentation issues associated with excess ink.
Implement Quality Control Checks
Regularly perform visual inspections and wash tests to catch any opacity loss or fringing early. Use opacity measuring tools to ensure your DTF white underbase settings consistently deliver sharp, bright whites on dark garments.
Scale with Multi-Printer Setups and Environment Monitoring
If you run several DTF printers, keep all machines’ white channel configurations aligned by using identical RIP profiles and ink circulation practices. Monitor temperature and humidity closely to avoid viscosity shifts that affect drying and adhesion. Work with reliable suppliers like jinlong DTF to secure consistent, high-quality white ink formulations suited for large-scale runs.
Following these steps helps you balance cost, speed, and quality—putting you on track for consistent DTF prints that meet client expectations without downtime or waste.


