The Ultimate DTF Beginner’s Guide: From Equipment Selection to Your First Print
Introduction: What Is DTF Printing and Why It Matters
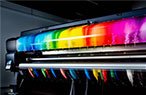
Direct to Film (DTF) printing is a revolutionary digital textile printing method that allows you to transfer vibrant, full-color designs onto a wide range of fabrics. Unlike traditional screen printing or heat transfer vinyl, DTF does not require pre-treatment, works on cotton, polyester, blends, and even dark garments, and produces durable, soft-touch prints.
For beginners and small businesses, DTF offers:
- Versatility: Works on different fabrics and garment types.
- Low entry barrier: No need for large production setups.
- Scalability: Easy to start small and grow as your business expands.
This guide will take you step by step — from equipment selection to your very first successful print.

Part 1: Choosing the Right Core Equipment
1. DTF Printer
Your printer is the heart of the workflow. When selecting:
- Print Width: Small-format (30cm) for startups; wide-format (60cm or larger) for higher output.
- Print Heads: Epson i3200 or XP600 are common — i3200 offers faster speed and stability, XP600 is more affordable.
- Ink Compatibility: Ensure the printer is designed for water-based pigment inks.
Expert Tip: Avoid converted home printers if you plan to scale. Industrial-built DTF printers offer more reliability and consistent output.

2. Powder Shaker and Dryer (Optional for Small Runs)
- Manual Powdering: Suitable for small batches — manually applying and shaking hot-melt adhesive powder.
- Automatic Shaker & Dryer: Essential for medium to large production — ensures even coating and consistent curing.

3. Heat Press Machine
- Flat Heat Press: Standard for apparel printing; size 15×15 inches or larger is ideal.
- Key Features: Even pressure, adjustable temperature control, Teflon-coated plates for smooth release.

Part 2: Understanding Essential Consumables
1. DTF Ink
- Pigment-based CMYK + White: White ink forms the underbase, CMYK builds the design.
- Considerations: Stability, color vibrancy, and nozzle-friendliness. Poor ink can cause clogging.
2. DTF Film
- Cold Peel Film: More forgiving for beginners, peel after garment cools.
- Hot Peel Film: Faster workflow but requires precise timing.
3. Hot-Melt Adhesive Powder
- Grades: Fine (better for detail) vs. coarse (durable for heavy garments).
- Function: Acts as the glue bonding ink to fabric.
Note: Always store inks, films, and powders in a dry, temperature-stable environment to maintain quality.

Part 3: From Zero to One – Your First Print Step by Step
- Prepare Your Artwork
Use graphic design software (Photoshop, Illustrator, CorelDRAW). Export as PNG with a transparent background. - RIP Software Settings
- Import design into RIP (e.g., Acrorip, Cadlink).
- Set ink channels: print white underbase + CMYK on top.
- Choose correct ICC profile for color accuracy.
- Printing
- Load PET DTF film matte side up.
- Ensure printer is calibrated for accurate alignment.
- Powder Application
- Evenly coat the print with hot-melt powder.
- Shake off excess to avoid clumps.
- Curing
- Use curing oven or heat press (hover, do not press).
- Typical setting: 160°C (320°F) for 2–4 minutes until powder melts clear.
- Heat Transfer to Garment
- Place film on fabric, ink side down.
- Press at 160–170°C (320–340°F) for 15–20 seconds with medium pressure.
- Peel & Finish
- Peel film according to type (hot or cold).
- Repress with Teflon sheet for 5–10 seconds to enhance wash fastness.

Part 4: Common Problems and Solutions
| Problem | Cause | Solution |
|---|---|---|
| Printhead clogging | Ink sedimentation | Agitate white ink daily, run nozzle checks |
| Uneven powder coating | Manual shaking inconsistency | Use an automatic powder shaker |
| Cracks after washing | Incomplete curing | Increase curing time or temperature |
| Faded colors | Wrong ICC profile | Reconfigure RIP software and profiles |
Expert Tip: Always run test prints before mass production. Small adjustments save time and money.
Conclusion: Moving Beyond the First Print
Congratulations — if you followed these steps, you’ve completed your first DTF print! From here, you can experiment with:
- Expanding Product Range: Tote bags, hoodies, caps, home textiles.
- Workflow Automation: Invest in an automatic shaker and larger press for scaling.
- Advanced Topics: Color calibration, film types, hybrid workflows with DTG.
DTF is a growing field, and with practice, you’ll find your own optimized workflow.

FAQ (Encourage Interaction)
Q1: Can I print on 100% polyester?
Yes, DTF works well on polyester, cotton, blends, and even nylon with proper settings.
Q2: How long do DTF prints last?
With correct curing and pressing, prints can withstand 40–60 washes without significant fading.
Q3: Is DTF better than DTG?
Not necessarily “better,” but more versatile — DTF skips pre-treatment and handles more fabrics.
👉 If you have questions or face specific issues with your setup, leave a comment or reach out — your learning journey is just beginning!
What Beginners Usually Care About After the First Print
Finishing your first DTF print is an important milestone—but for most beginners, the real questions start after that moment. As you continue practicing and preparing for real orders, three practical concerns will quickly become clear: how easy the system is to use day to day, what kind of support you can rely on, and how much it really costs to get started and grow.
Ease of Use: Why Simplicity Matters More Than Speed
At the beginner stage, consistency matters more than maximum output.
An easy-to-use DTF setup helps you:
- Reduce setup errors and wasted materials
- Spend less time troubleshooting and more time printing
- Learn the workflow faster without advanced technical knowledge
User-friendly printers, stable ink systems, and clear RIP software settings allow beginners to focus on mastering fundamentals instead of fighting equipment.
After-Sales Support: Learning Doesn’t Stop at Installation
Even with proper preparation, questions will come up—white ink circulation, curing consistency, color matching, or maintenance routines.
For beginners, dependable after-sales support acts as an extension of your learning process:
- Step-by-step setup guidance shortens the learning curve
- Technical support helps solve problems before they affect orders
- Real printing advice prevents small issues from becoming costly mistakes
Strong support is often what separates a smooth beginner experience from a frustrating one.
Entry Cost: Start Lean, Upgrade with Confidence
DTF printing is beginner-friendly largely because you don’t need to invest everything upfront.
A basic starter setup allows you to:
- Begin with small batches and test the market
- Avoid high-risk, large-scale investments
- Upgrade individual components as your order volume grows
This gradual approach lets beginners control costs while building confidence and real-world experience.
Bringing It All Together
As a beginner, success in DTF printing isn’t just about getting a good first result—it’s about creating a workflow that is easy to manage, supported when problems arise, and affordable to grow.
If your setup meets these three conditions, your transition from learning to production will feel far more natural—and far less stressful.
👉 If you’re unsure whether your current or planned setup fits your beginner stage, feel free to leave a comment or ask questions. Every experienced DTF printer started exactly where you are now.